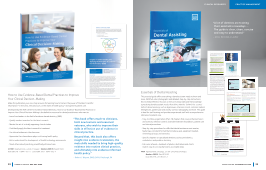
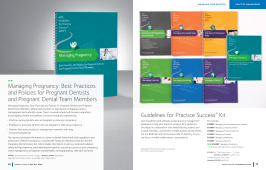
Essentials of Dental Assisting This practical guide offers everything a dental assistant needs to know and more. With full-color photographs and detailed, step-by-step instructions, this essential reference focuses on the core clinical skills and the knowledge a practicing dental assistant needs. Also delves into the “behind-the-scenes” skills of dental assisting, such as legal issues, infection control, common medical emergencies, patient pain and anxiety control, radiography and more. This guide is ideal for staff training and provides experienced staff with a comprehensive reference to patient care. • Easy-to-follow organization offers 28 chapters that cover profession basics and sciences, infection control, chairside treatment foundations, patient care and clinical procedures • Step-by-step procedures for skills that dental assistance must master, featuring a consistent format that includes a goal, equipment needed, chronological steps and rationales • Specific chapters on specialized dentistry such as periodontics, endodontics and pediatric dentistry • Full-color artwork—hundreds of photos, illustrations and charts make it easy to see exactly how to accomplish tasks P050 Paperback book, 505 pages, 275 full-color photos and images Members $89.95 Retail $134.95 Book ISBN: 978-1-941807-34-7 “A lot of dentists are training their assistants nowadays … The guide is clear, clean, concise and easy to understand.” – Doni L. Bird, CDA, co-author 338 PARTEight ✴ Restorative Dentistry FIGURE 21-7 Placement of a retention pin for added internal strength. • The dentist will evaluate the tooth to be restored. • The dentist will administer local anesthesia (see Chapter 14). • The assistant will prepare and assist in the type of moisture control (cotton roll, dry angles, dental dam) to be used for the procedure (see Chapter 10). • The dentist will prepare the tooth, including using dental hand instruments and dental handpieces with rotary instru- ments (see Chapter 19). • The dentist will specify which dental materials are to be used (see Chapter 20). • The assistant will prepare and assist in the placement of the dental materials. • The assistant will prepare and assist in checking the occlusion. • The dentist will finish and polish the restoration. See Procedure 21-4: Assisting in a Class II Amalgam Restora- tion, and Procedure 21-5: Assisting in a Class III or IV Com- posite Restoration. Complex Restorations If the loss of tooth structure is greater than the remaining natural tooth, then the dentist must decide whether to (1) move ahead and restore the tooth with an amalgam or a composite material, or (2) change the treatment plan and replace the tooth structure with a cast restoration. Bonding techniques and reten- tion pins are best suited for use in teeth that require very large restorations with little tooth structure remaining to provide strength and retention for the amalgam. Retention pins provide internal strength to the placed mate- rial (Figure 21-7). These pins are available in a variety of diam- eters (widths) and styles to fit all sizes of teeth. Because all retention pins are very small (approximately one half the size of a bur) and are easily dropped, the dental dam should be indicated for this procedure. Veneers A veneer is a thin layer of tooth-colored material that can be directly bonded onto the tooth or fabricated in the laboratory using a porcelain material and then cemented to the tooth surface (Figure 21-8). Veneers are used to improve the appearance of teeth that are slightly abraded, eroded, or discolored from stains or from endodontic treatment. Veneers can also be used to improve the alignment of teeth or to close a diastema. Vital Bleaching Vital bleaching, also referred to as tooth whitening, is a tech- nique that involves the whitening of the external surfaces of the teeth. This desired whitening is completed for esthetic purposes, not for restorative purposes (Figure 21-9). FIGURE 21-8 Veneers placed on teeth #8 and #9 to reduce discoloration and to cover stain. A, Before placement. B, After placement. (From Heymann HO, Swift EJ, Ritter AV: Sturdevant’s art and science of operative dentistry, ed 6, St. Louis, 2013, Mosby.) A B CHAPTER 21 ✴ Restorative Procedures 335restoration bonding material may be required before the amalgam or com- posite is placed. Matrix Systems A tooth that is to receive a Class II, III, or IV restoration will have a minimum of one interproximal wall or surface of the tooth removed during the cavity preparation stage. By including the use of a matrix system, a temporary wall is created, against which the restorative material is placed until the material has set. The universal retainer and matrix band is the system most commonly used when placing posterior restorations (Figure 21-1). The retainer firmly holds the matrix in place. A matrix is a metal or clear plastic band used to replace the proximal wall of a tooth during placement of the restorative material. (Matrix is singular. The plural form is matrices.) Clear plastic matrices are used for anterior composite restorations. A wedge is triangular or round and is supplied in wood or plastic (Figure 21-2). The wedge is available in different sizes, depending on the location and space between the teeth. By Cavity Preparation Regardless of the type of dental material selected, understand- ing the steps of a restorative procedure is important. The steps include removal of the decay by the dentist, preparation of the tooth cavity, placement of dental materials, and finishing the restoration. The most detailed part in restoring a tooth is the cavity preparation. The purpose of cavity preparation is to remove the decay along with a small amount of healthy tooth structure, which, when completed, provides a solid foundation for the restorative dental material to be placed as a final restoration. To understand the different types of tooth preparations, you can review the types of cavity classifications in Chapter 12. The dentist will use a high-speed handpiece with a variety of burs and hand instruments to accomplish this preparation step. Once the decay is removed, the dentist will use the high- speed handpiece with a different-shape bur to place retentive grooves in the preparation. These small grooves in the tooth allow the material to flow into the groove area, harden, and create the retentive result. In the next step, the dentist determines the type of restorative material that will be used. This decision is based on the size, shape, and location of the preparation. With small preparations, an amalgam or composite material can be directly placed over sound dentin. With deeper preparations, a cavity liner, base, and FIGURE 21-1 Matrix and wedge correctly positioned. FIGURE 21-2 Assortment of wedges. (Courtesy Premier Dental Products Company, Plymouth Meeting, Pennsylvania.) Dental Conditions Requiring Esthetic Dental Treatment • Discoloration attributable to extrinsic or intrinsic staining • Anomalies caused by developmental disturbances • Abnormal spacing between teeth • Trauma Dental Conditions Requiring Restorative Dental Treatment • Management and treatment of carious lesions by restoring them with a permanent restoration • Restoration of defects in tooth structure • Replacement of failed restorations • Abrasion or wearing away of tooth structure • Erosion of tooth structure Restorative dentistry is indicated when teeth are to be restored to their original structure with the use of direct and indirect restorative dental materials. The common types of pro- cedures include amalgam restorations, composite resin restora- tions, and complex restorations. Esthetic dentistry is directed on improving the appearance of teeth by restoring imperfections with direct and indirect restorative materials or with the use of whitening techniques. The common types of procedures are composite resin restora- tions, resin veneer restorations, and tooth whitening. 336 PARTEight ✴ Restorative Dentistry FIGURE 21-3 Assorted matrix bands. Universal band Occlusal edge Occlusal edgemissing Gingival edge Gingival edge Extension band FIGURE 21-4 Burnishing the matrix band will provide a better contour. (From Heymann HO, Swift EJ, Ritter AV: Sturdevant’s art and science of operative dentistry, ed 6, St. Louis, 2013, Mosby.) make proper contact with the adjacent tooth (Figure 21-4). To contour the band, place the band on a paper pad, using a burnisher or handle end of cotton pliers. Rub the inner surface of the band until the ends begin to curl. This thins the band and provides a normal curvature of the band to fit around the tooth. Universal Retainer The universal retainer, also referred to as Tofflemire retainer, is a device that holds the matrix band in position. The compo- nents of the universal retainer are described in the box titled “Components of a Universal Retainer.” See Procedure 21-1: Assembling a Matrix Band and Univer- sal Retainer. 1. Spindle: This internal screwlike pin fits into the diagonal slot to hold the ends of the matrix band. When the retainer is assembled, the spindle point must be clear of the slot while the band is slid into the slot and then tightened. 2. Outer guide slots: Also known as guide channels, these slots are located at the end of the retainer and serve as channels to guide the loop of the matrix band. The channel selected is determined according to the quadrant that is being treated. 3. Outer knob: The outer knob is used to tighten or loosen the spindle within the diagonal slot and to hold the matrix band securely in the retainer. To tighten the Components of a Universal Retainer Spindle pin (stabilizes band in holder) 1 3 4 5 2 Outer slot to hold position of band Diagonal slot to receive ends of band Inner knob Outer knob placing a wedge, the proper anatomic contour of a is created. Posterior Matrix System The matrix band and universal retainer should be assembled before the procedure to save time during the procedure. Matrix Bands Matrix bands selected for Class II posterior restorations are made of a flexible stainless steel and are available in universal and extension sizes. The band wraps around the tooth, creating a temporary wall (Figure 21-3). Before the band and the retainer are assembled, the band should be contoured in the proximal area so the tooth can How to Use Evidence-Based Dental Practices to Improve Your Clinical Decision-Making Make this publication your one-stop resource for learning how to harness the power of the latest scientific information—in the clinic, the classroom, or the realm of health policy—and optimize patient care. Developed by the ADA Center for Evidence-Based Dentistry, How to Use Evidence-Based Dental Practices to Improve Your Clinical Decision-Making is the definitive resource for dental practitioners who want to: • Learn from leaders in the field of evidence-based dentistry (EBD) • Quickly conduct searches for the latest research • Master the art of critically appraising clinical studies • Confidently apply the latest research to treatment • Use clinical evidence in the classroom • Appreciate the role evidence plays in informing health policy • Better understand the development of health technology assessments • Teach others about practicing scientifically informed care J079BT Paperback book + e-book, 312 pages | Members $69.95 Retail $104.95 Book ISBN: 978-1-68447-061-7 | e-book ISBN: 978-1-68447-062-4 “This book offers much to clinicians, both new learners and seasoned veterans, who wish to improve their skills in effective use of evidence in clinical practice. Beyond that, this book also offers insight into evidence translation, the meta skills needed to bring high-quality evidence into routine clinical practice, and ultimately into evidence informed health policy.” - Robert J. Weyant, DMD, DrPH, Pittsburgh, PA CLINICAL RESOURCES 22 ORDER ONLINE: ADACATALOG.ORG 23 PRACTICE MANAGEMENT ORDER BY PHONE: 800.947.4746
Purchased by ,
From: ADA Ebooks (ebooks.ada.org)


